


Maintain an AR-15
Maintenance is not fun but it is required


Maintain an AR
We maintain weapons for two reasons. We maintain them to preserve them, and we maintain them to ensure proper functioning.
Preservation means that the weapon does not surrender to corrosion and rust. This requires that the surfaces and operating parts of the weapon be clean and coated with a preservative chemical (normally oil or a lubricant/preservative specifically made for use on firearms).
Proper functioning means that all the parts operate properly without interference from carbon, corrosion, rust, mechanical failures due to wear, nor other issues.
Maintenance is more than cleaning. Cleaning is, of course, important and it is what we do most often. Each time you clean a weapon, you should check the various parts and pieces for wear. Some parts (springs, gas rings, chamber throats, and others) do wear out from use. Replacement of those parts when appropriate can help keep your weapon functioning properly.
In this article, we will take a subsystem approach to AR maintenance. Maintenance of AR weapons is pretty much the same whether it is an AR-15 or an AR-10. This article does not cover maintaining external accessories. Each of those will have a maintenance routine specified in its owner’s manual. Use that routine.
How Often
There are approximately a gazillion experts on the internet with at least that many opinions about how often you should clean and maintain your AR. Most of them are wrong. Some of them are harmful as well as wrong.
At a minimum, you should clean your AR before you store it. Storing your AR without cleaning out the carbon and other deposits leads to corrosion. If you clean it before you store it, your weapon will last longer and function better.
In use, say at a competition, you should clean your AR no less than once per day. You may want to clean it more often depending on how much you shoot. Quick cleaning takes only minutes and should become a normal routine for you. A quick cleaning, especially of the bolt and bolt carrier group, after every couple of hundred rounds is always a good thing to do.
Wear Gloves
The solvents and lubricants used for weapons maintenance are not good for you. Wear gloves to protect your hands. You can buy a box of nitrile (or similar) gloves at your favorite hardware store. Safety glasses will prevent splashing anything in your eyes. A shop apron will protect your clothes.
Prepare the Weapon for Maintenance
Make sure the rifle is unloaded. Separate the lower receiver from the upper receiver. Remove the bolt carrier group from the upper receiver. Make sure any optics have a protective cover. While it is not completely necessary, removing slings, bipods, and other accessories makes the rifle easier to manipulate.
You can clean/maintain the various parts of the rifle in any sequence, but the sequence below is a good one.
Barrel
Upper Receiver
Lower Receiver
Trigger
Bolt Carrier Group
Barrel Cleaning and Maintenance
Let us cover the materials you need for barrel maintenance first. Then we will talk about how to maintain your barrel.
First, and I cannot stress this enough, buy a non-jointed cleaning rod. A jointed cleaning rod is one where several pieces screw together to make a longer rod. The idea is to make the rod compact enough to fit in a carry kit.
A jointed cleaning rod will permanently damage your barrel. Each joint in the cleaning rod flexes as you push it through the barrel. When the joints flex, they dig into the sides of the barrel and create tiny little gouges. This will affect accuracy. Do not use a jointed cleaning rod.
Buy a good quality steel or carbon fiber cleaning rod. I like carbon fiber, but I have a steel cleaning rod too.
Decide if you want to use a jag or patch holder to push your patches through the barrel. I like the jag better. It covers the barrel better with a patch. The patch holder also has the possibility of gouging the barrel (see the paragraph above). Having said that, many people use a patch holder successfully and since I could take a picture of one; I obviously have one (or several).

You will need a bore brush and a chamber brush. These should be made of a soft metal such as bronze. The reason for the soft metal is that you want the brush to loosen the materials that foul a barrel, but you do not want the brush to damage the barrel metal.
The picture below shows several useful brushes. Your collection will be bigger than this if you shoot (and clean) very much.

You will need some solvent. There are lots of choices for barrel solvent and each has its acolytes. That may seem like a small hill to die on but there are shooters who will do it. Pick a quality solvent – it will be good enough. The solvent softens the carbon deposits and helps remove the copper fouling from the barrel. If you are doing it right, you will not use much of it and so a bottle will last a long time. I use Hoppe’s Number 9 but there are a lot of options out there for barrel solvent.
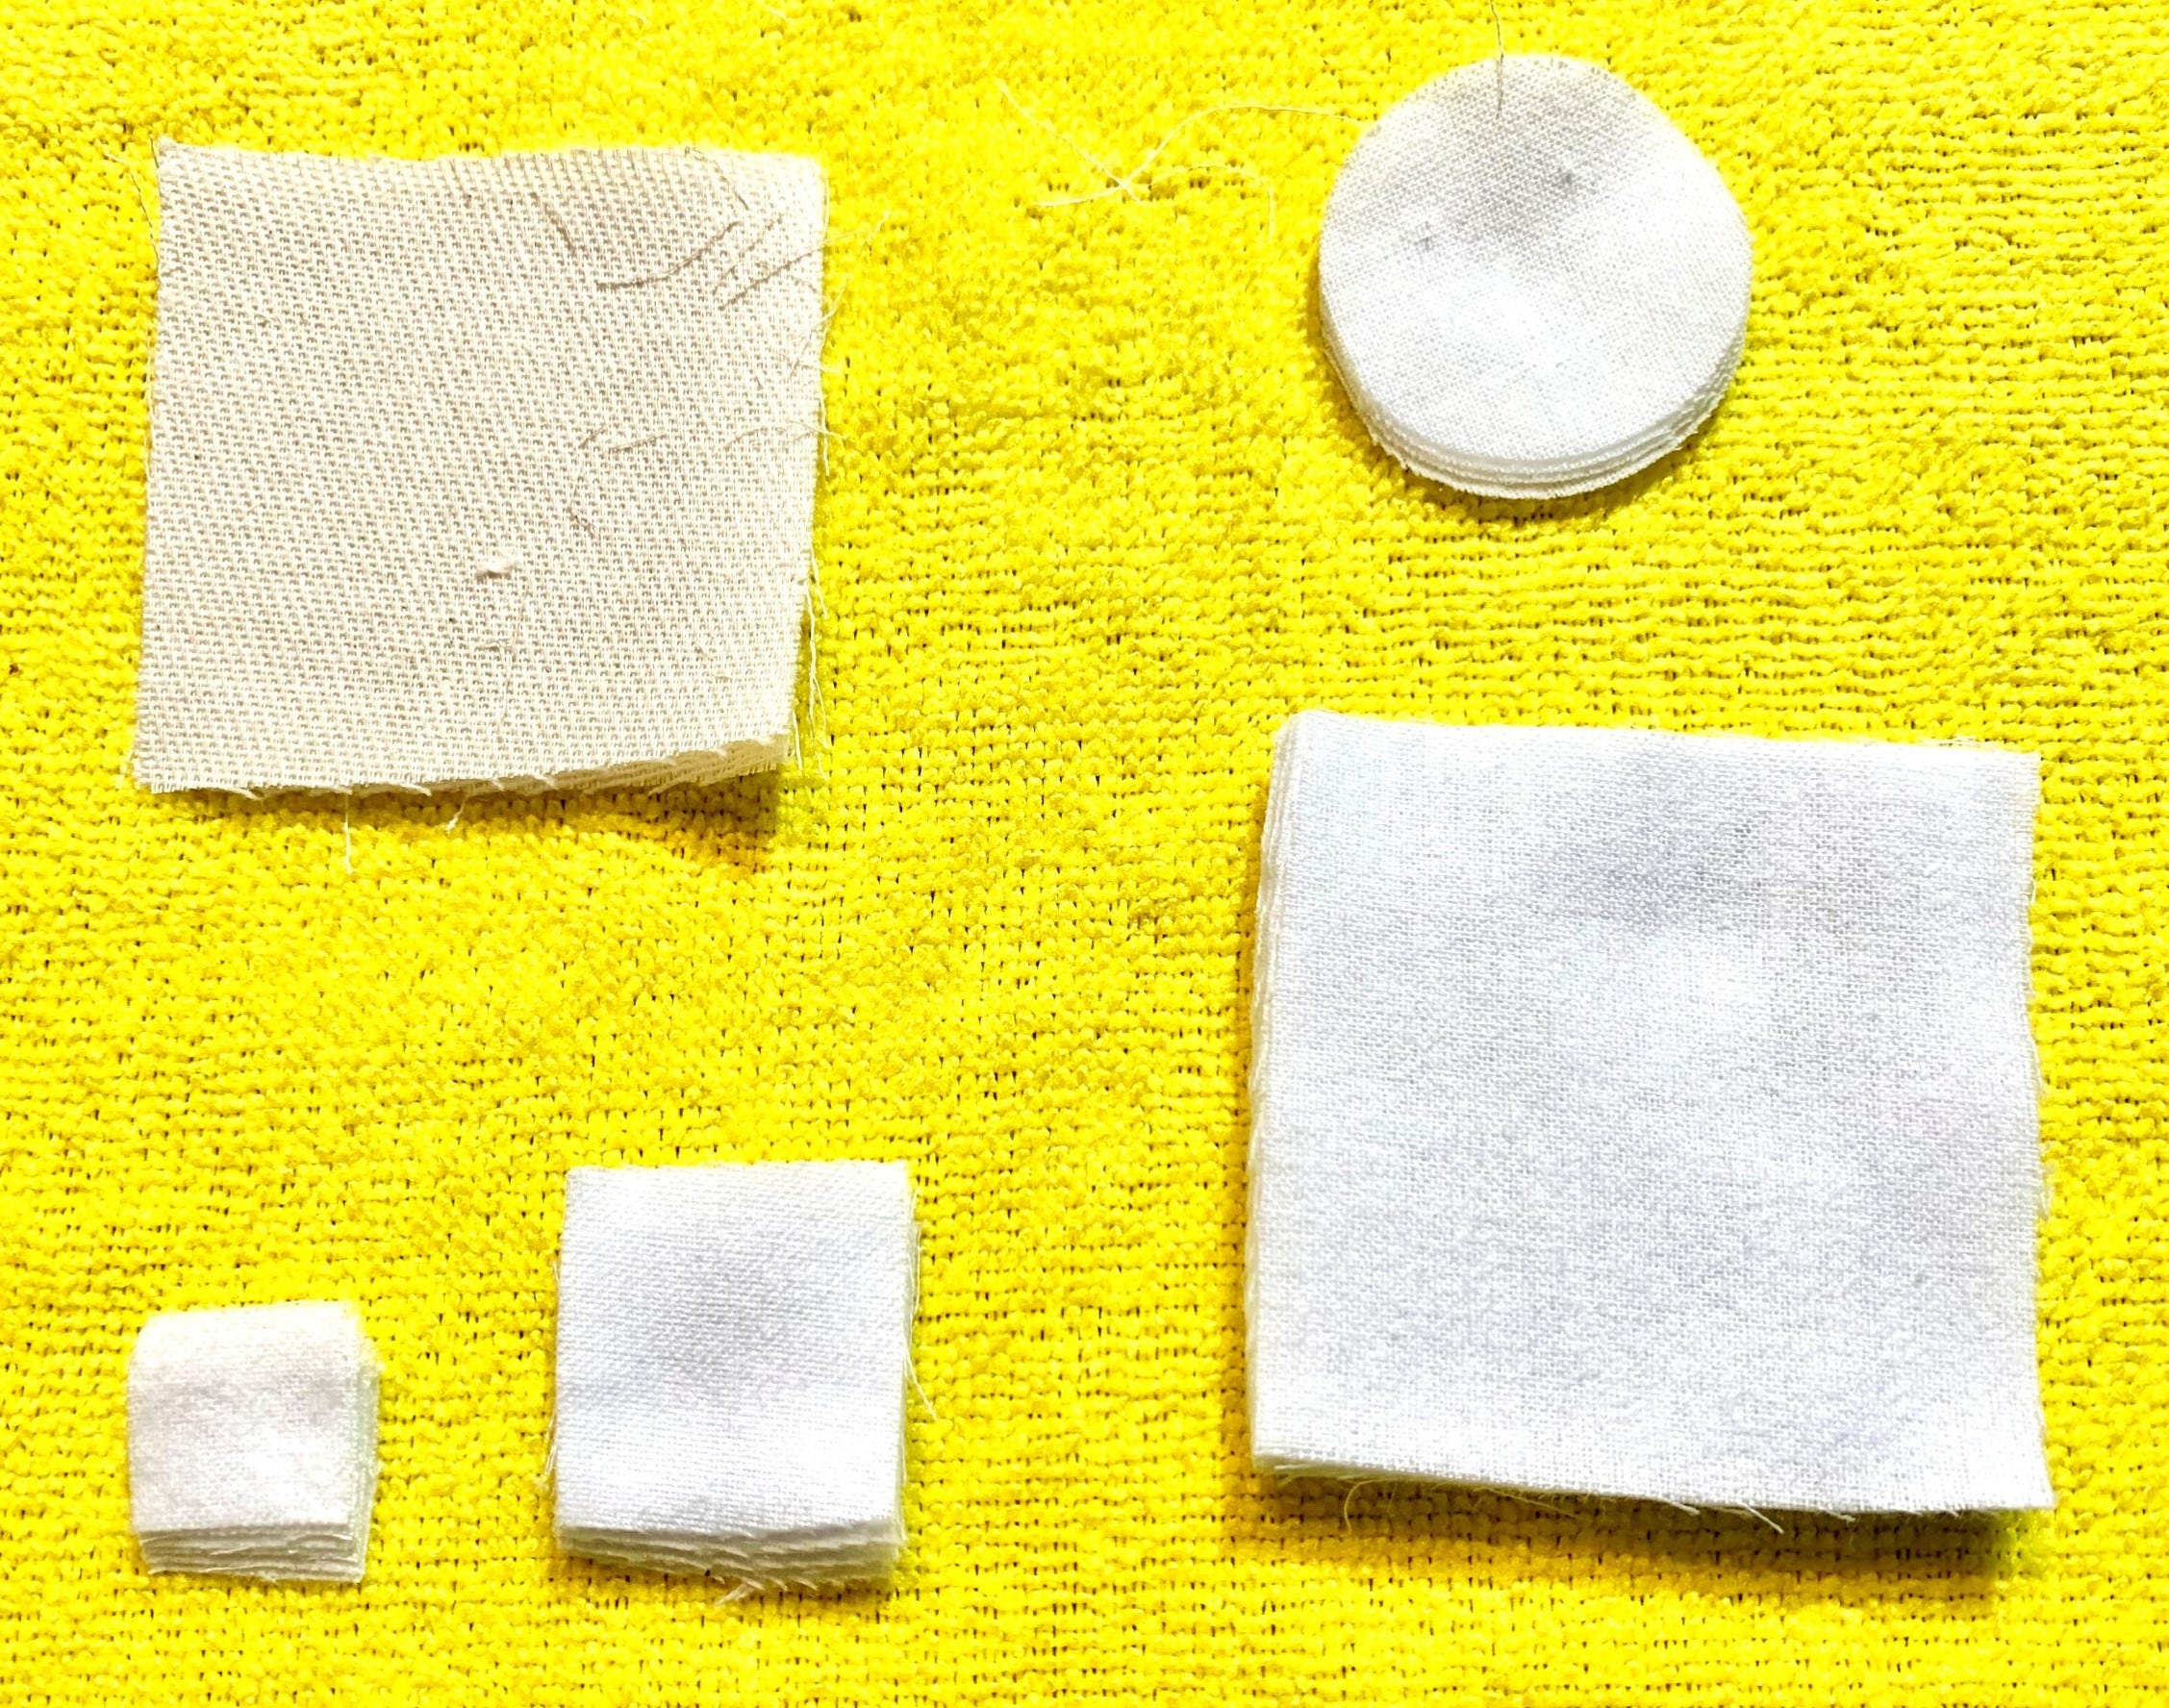
You will need some patches. The patches should be sized for your bore size. Patch size depends on bore size, patch material, and jag (or patch holder) size. Depending on that triplet, the right patch size for a .223/5.56 is usually between ¾ inch square and 1 ¼ inch square. You want the patch to fit tightly enough that the jag forces the patch material into the grooves.
Finally, you will need some Q-tips. Q-tips are invaluable for reaching into small spaces (like AR-15 barrel extensions). Use them to apply solvent, to wipe carbon out, and to apply lubricant. Q-tips with the cardboard shafts work better than the Q-tips with the plastic shafts. You can bend the cardboard shafts more easily to reach places like the bottom of the barrel extension.
Clean the barrel bore first, then the chamber, then the barrel extension, and finish by cleaning the muzzle device.
To clean the barrel, soak a patch or two in barrel solvent. Put the patch on the jag (the jag tip will poke through the patch) and push the patch from the chamber end through the barrel. Patches go one way. Remove it from the jag at the muzzle end. Pull the rod back through the barrel, put another solvent soaked patch on it and then push that patch one way. Do that until you are satisfied that the solvent has removed as much fouling material (carbon or leading) as it can.
If you need to use a bore (bore is the term for the inside of the barrel) brush, this is the time. The barrel should have solvent in it before you put a brush through it. Use bore brushes sparingly and only use bore brushes made with soft metal like bronze. They are occasionally necessary but do not overdo it with the bore brush.
Many people think of rifles like hammers or anvils, meaning it is okay to be a little rough with them. It is better to treat them like precision instruments. That means handle them as gently as possible. Use the bore brush only when you really need it. Patches are easier on the bore and the bore will last longer if you are as gentle as you can be with it.
After the solvent patches (and maybe the brush), run a couple of dry patches through the bore. Then add oil (CLP or your favorite lubricant/preservative) to a couple of patches and run them through the bore. Remember, patches go one way one time.
Finish by running as many dry patches as necessary (one way only) through the bore. “Run a patch through until it comes out clean” is the rule.
After the bore, it is time to clean the chamber. Chambers accumulate burned powder residue (carbon) and should be cleaned every time you clean the rifle. Clean the chamber using patches and solvent. Soak a large patch in solvent. Put that patch around a cleaning brush and use the bristles of the cleaning brush to hold it in place. Put the patch in the chamber and rotate it to loosen the carbon.
A chamber brush should only rarely be necessary. If it is necessary, make sure that you have solvent in the chamber first.
Repeat the process with dry patches until the patch comes out clean. Then use a patch with lubricant on it to very lightly oil the chamber. After the chamber is lubricated, use a couple of patches to dry the chamber.
Chambers should be as dry as possible while retaining a film of preservative lubricant. In practice, this means wiping it with clean patches until it appears dry and shiny. Too much lubricant in a chamber can cause the cartridge case to stick and fail to extract when you fire the rifle. The picture below shows a dirty chamber on the left and the same chamber after cleaning on the right. I took these pictures with an endoscope. The black coating in the picture on the left is residue from firing. This is the carbon residue from a few dozen rounds. You can imagine how much will be deposited by hundreds or by thousands of rounds. On the right, you see only the gray surface of the chamber and then the throat/barrel. You can see the barrel rifling in the picture on the right. The carbon obscures the rifling in the picture on the left.

After you clean the chamber, clean the barrel extension. The barrel extension is often neglected. The barrel extension is where the bolt locks up. It should be clean and lightly lubricated. Clean means completely carbon free. A sufficiently dirty barrel extension can hinder lockup and will masquerade as a cycling issue. This is an issue that I have seen at shooting competitions.
Use a chamber brush to clean the barrel extension. AR-15 chamber brushes have a section at the rear that will loosen the carbon in the barrel extension. Use a combination of patches and Q-tips (yes, Q-tips) to remove the carbon. Take your time and get it all out.
The left picture below is a slightly dirty barrel extension (a few dozen rounds). I have seen much worse. The right picture is a reasonably clean barrel extension. When it is clean, you should see only shiny metal.

As part of cleaning the barrel extension, clean the locking lugs feed and ramps. Use a combination of patches, brushes, and Q-tips to clean and lubricate the locking lugs and feed ramps.
When you finish, all the surfaces should be clean and dry with a very light coat (very light means almost dry) of lubricant.
Upper Receiver
Next, clean the remainder of the upper receiver. Start with the inside. This is mostly a matter of wiping out the carbon residue that accumulates with each round fired. Use clean shop rags with sometimes a little bit of solvent to loosen any baked-on carbon. The standard here is that a patch should “come out clean” meaning that when a patch remains clean after wiping a surface. Pay particular attention to the area around the gas tube and the gas tube itself. Q-Tips are useful for cleaning around and beneath the gas tube. A brush is useful for inserting a rag from the rear of the receiver to wipe it out. After it is completely clean, make sure that all surfaces have a light coat of lubricant.
Cleaning the charging handle is a wipe job. Use a patch and a brush to wipe off/out all the carbon. Make sure to clean the hole in the front end of the charging handle. The gas tube passes through that hole and cleanliness is good. Put a very small drop of lubricant on the charging handle latch and latch roll pin.
There are a few areas that are often neglected. Make sure you clean and lube the rails that the charging handle rides in. Clean and lightly lubricate the holes for the lower receiver pivot pins. A wipe down and a tiny (tiny) bit of lube on the forward assist is a good thing. Ditto the ejection port cover, spring, and pin. Finally, clean the picatinny rail.
A black phosphate receiver can hide a lot of carbon. Receivers in other colors (e.g., Flat Dark Earth) make it much easier to see the carbon.
When all that is completely clean, wipe the outside down with a light coat of preservative lubricant and wipe as much off as you can. The exterior should feel dry but have a slight sheen of lubricant.
Lower Receiver
When the upper receiver is clean, move on to the lower receiver. Remove the buffer and buffer spring to prepare for cleaning. Lower the hammer. Use your thumb to ease it down. Do not dry fire a disassembled AR-15.
Cleaning the lower receiver is mostly a carbon removal task that can mostly be done with rags and patches.
Wipe the buffer spring and buffer down to remove any carbon. Using a brush or rod, run a clean rag down the buffer tube and back out again. Then run a large patch or rag with a tiny bit of oil down the buffer tube. Use that patch (or rag) to wipe the buffer spring and buffer down leaving a very light coat of lubricant. Wipe out the threads where the buffer tube is screwed into the lower receiver. Remove any carbon from the buffer retainer. Go ahead and reinstall the buffer and buffer spring.
You can remove the trigger and hammer for cleaning but that is rarely necessary. When it is really dirty, hold the lower receiver upside down and hose out the inside of the lower receiver with brake cleaner or your favorite brand of “gun scrubber.” The gun scrubber will remove most of the carbon and you can use patches, Q-tips, and rags to get the rest. The inside of the lower receiver should be completely carbon free when you finish.
Use a Q-tip to lubricate the springs, safety selector, hammer, sear, and disconnector. This should be an extremely light coat of lubricant. Too much lubricant in the lower receiver is as much of a problem as no lubricant. As with most items on an AR-15, the surfaces should appear and feel dry but have a slight sheen of lubricant.
Use a clean shop rag to wipe out the magazine well. Push the magazine catch as far as you can and wipe the part the protrudes from the left side of the weapon. Lubricate that lightly.
Operate the bolt catch and clean the area between the bolt catch and the receiver with a patch. Remove all the carbon from the bolt catch.
Wipe the takedown pins and use a Q-tip to clean the channel in each pin. Lightly lube the outside of the pins and the channel.
Wipe the exterior clean and coat it with a light preservative coat of lubricant.
Bolt Carrier Group and Bolt
This is the heart of an AR-15. If it is not clean and properly lubricated, then trouble will ensue. There are specialized tools for some of the tasks and that makes it easier, but you can get the job done with brushes, patches, Q-tips, solvent, and lubricant. A word about Q-Tips is necessary here. Q-Tips are great for cleaning inside the passages of the bolt and bolt carrier group, but you have absolutely ensure that no Q-Tip fibers are left in the passages.
Disassemble the bolt carrier group and bolt. Let us start with the bolt carrier. Our objective is a carbon-free and properly lubricated bolt carrier.
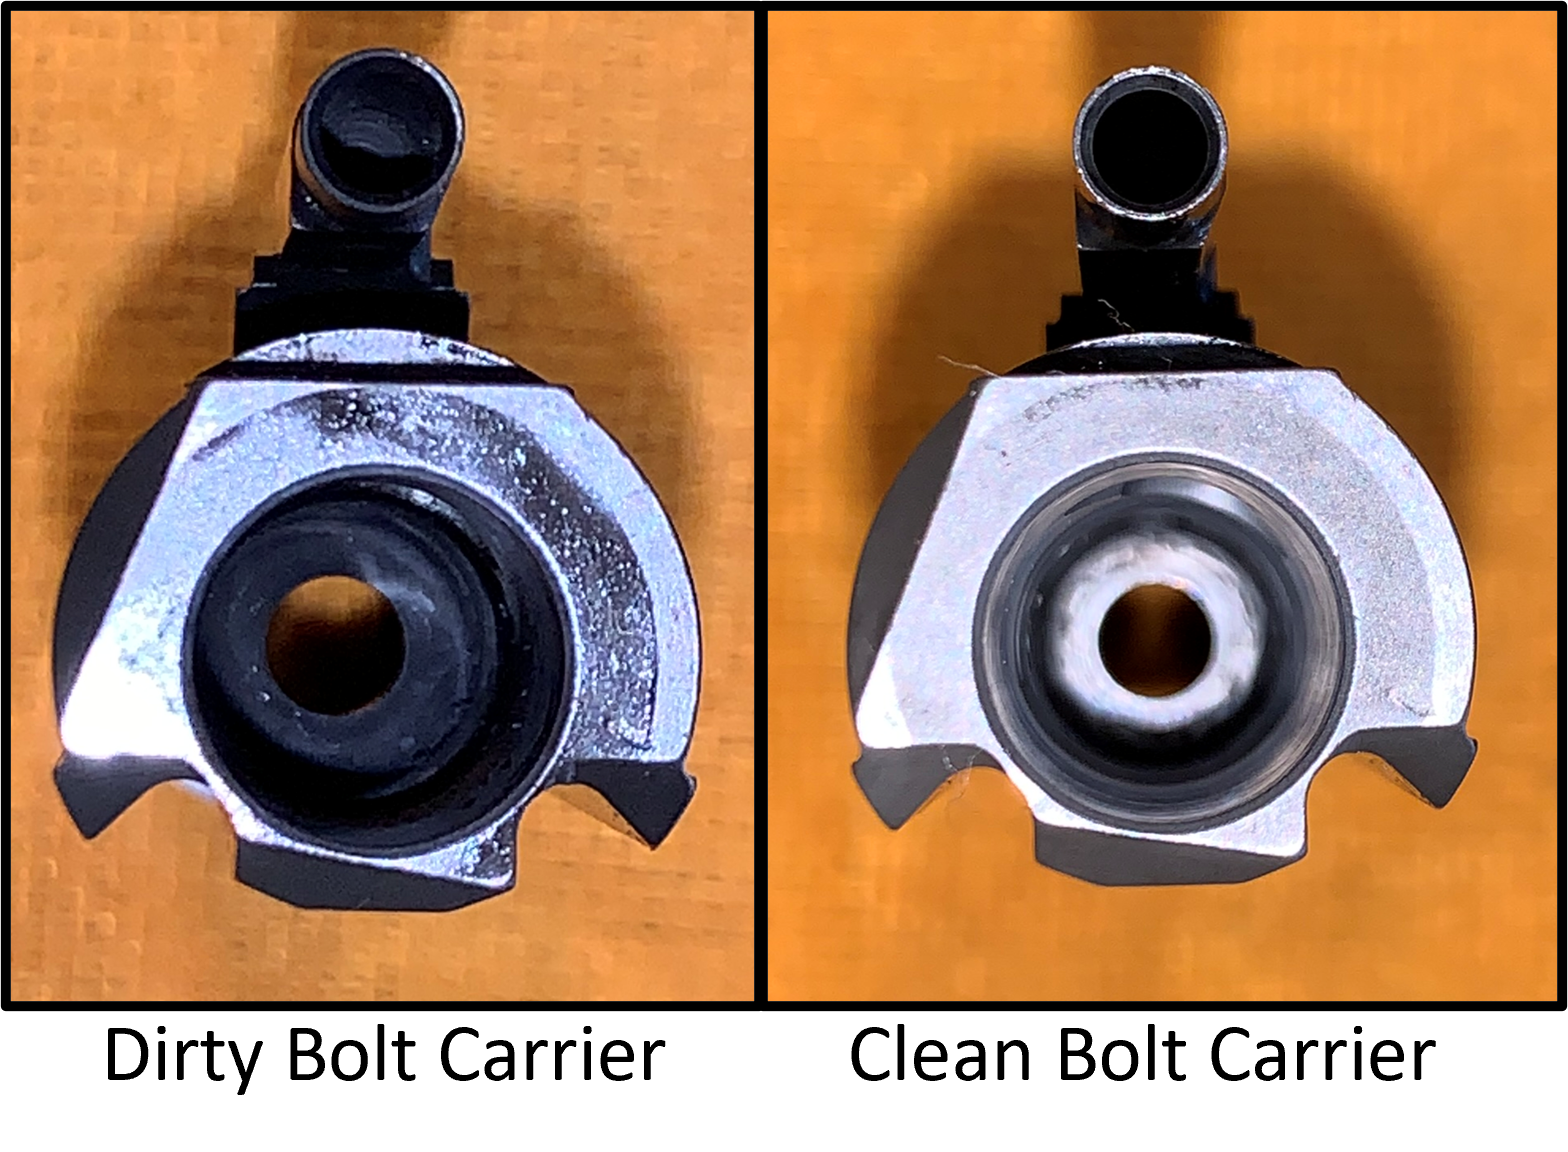
The difference is easy to see in the pictures below. On the left, you can see carbon on the face of the bolt carrier but the insidious carbon that causes malfunctions is down at the bottom of the channel that the bolt moves in. The larger hole is where the gas rings and the main part of the bolt move back and forth. The small hole at the bottom is where the bolt tailpiece rides. Carbon buildup in and around that hole (and on the bolt tailpiece but more on that in a moment) can slow the movement of the bolt. Carbon build up in this area can cause cycling issues by slowing the movement of the bolt.
Carbon also accumulates in the gas key.
All of this carbon must be removed. If you do not see shiny metal as in the picture on the right, then keep working.
Use rags, patches, solvent, and brushes to remove the carbon. Solvent (or brake cleaner) and careful use of a Q-Tip can clean the inside of the gas key. A dental pick can help loosen the carbon at the base of the bolt hole. Specialized tools are available that help, but persistence and elbow grease are the main tools for this job.
I do not have a picture of it, but the tailpiece hole should be cleaned from the other side as well. Use a patch and/or a brush to clean it from that side. As always, it should be completely free of carbon.
Clean the carbon that accumulates in the cam pin slot with a rag or a patch. Wipe all the carbon off the exterior of the bolt carrier.
When the bolt carrier is completely carbon free, coat the exterior with a light coat of lubricant. Coat the channel that the bolt rides in with a slightly heavier coat of lubricant. It should not be dripping, but you need a bit more lubricant in the channel (the bolt hole).
Bolt Cleaning
In this section, we will cover cleaning the bolt, the firing pin, the cam pin, and the firing pin retainer.

Wipe all the carbon you can off the firing pin and then use a bronze brush or similar to remove the remaining carbon. Complete carbon removal is the standard here. You should only see shiny metal.
Wipe and lightly lube the firing pin retainer. Do the same for the bolt cam pin. Be sure to clean the hole in the bolt cam pin. The firing pin passes through this hole during operation.
The bolt should be disassembled which means removing the extractor. It is rarely necessary to remove the ejector and ejector spring.
The extractor is removed by pushing out the extractor pin. Extractor pins do not often go “sproing” but hey, they are springs, so be careful. Lay your parts out (see the picture below) and let us get to work.

Wipe clean the extractor pin, extractor spring, extractor spring insert, and extractor spring O-ring. Coat the spring, pin, and insert with a light coat of lubricant.
Use a brush or pick to clean the groove in the extractor. The extractor groove is a key part to clean. Carbon builds up in the groove and, if it gets dirty enough, can cause a failure to extract.
Wipe the extractor clean and use a Q-tip to clean the inside of the hole where the extractor pin goes. Lightly lubricate the inside of the hole.
Clean the locking lugs thoroughly. A wire brush and patches should do the job.
Use a wire brush to remove the carbon from the bolt face, from the inside of the bolt where the extractor fits, and from the exterior (especially) the tail piece of the bolt. The area around the gas rings can take a bit of effort. Take your time and get it clean.
Carefully run a Q-Tip down the firing pin channel (before you replace the extractor) and remove as much carbon as you can. It may take multiple passes and a little bit of solvent. If you use solvent in the firing pin channel, be sure to swab it dry.
Reassemble the bolt after all the carbon is removed and everything is clean and dry. A bit of lube on the sides of the extractor is a good idea but do not overdo it.
Reassembly
When everything is clean, reassemble the bolt into the bolt carrier. This is a good time to check the gas rings. Gas rings should seal against the inside of the bolt hole. A time-proven functional check for the gas rings is to extend the bolt outward (as it would be when the bolt is to the rear in the weapon) and stand the assembled BCG vertically on the bolt as in the picture below.
If the bolt remains in the extended position (left picture), your gas rings are probably fine. If the bolt collapses downward (as in the picture on the right) on its own, then the gas rings probably should be replaced. Gas rings do not last forever and eventually should be replaced. Worn gas rings can present as a weak cycling issue.

Function Check
After reassembling the bolt and bolt carrier group, reassemble your rifle and do a function check. The rifle is then ready to go into storage or to your next competition.
Summary
Reliable functioning requires a clean weapon. AR-15’s require cleaning and maintenance to function properly and reliably. Cleaning AR-15’s requires a cleaning rod with a patch jag (or holder), brushes, patches, shop rags, solvent, and lubricant.
Use gloves (nitrile or similar) when you clean weapons.
Clean your weapon as required but at least once per day when in use. Clean it before it is put away for storage. Storing a dirty weapon leads to corrosion of key parts.
Cleaning your AR-15 thoroughly leads to a better understanding of the rifle. Understanding makes you a better shooter.